Wednesday, December 31, 2008

January 2009 Get Inked! Kit by Queen Kat Designs


The January 2009 Get Inked! Kit is officially out for grabs. There are only 3 kits left as of today. This kit features the colour blue and a set of stamps that I've designed. The kit also includes the tutorial sheets for all the four projects above which I've specifically designed for this kit. Could you feel the "Zen"? The stamp is only available with this kit for now.

Here are the stuffs included in this kit.
~ A set of "Asian Flare" stamps designed by me
~ A Marvy Uchida Liquid Applique (blue) (This is such a fun pen)
~ A Colorbox Mini (midnight)
~ A packet of UTEE
~ Project/Technique Sheets written by me

Here's the link to the store.

Get Inked! Kits

So, grab your kit today before they're sold out. I'm not sure if they will do a wait list later but who wants to wait?...get yours now. Happy New Year everyone!

Tuesday, December 30, 2008

Distressing with Random Magic Mesh


This is a technique that I've used in my recent mini album project. It's such an easy technique to create a distress look on your projects especially non porous surfaces such as acrylics, transparencies etc.

Just simple cut out some pieces of Magic Mesh in your desired colours (preferably colours that works well with your project to create the distress look) and randomly paste them all around the edges of the project. Use some acrylic paint to paint part of the Magic Mesh to slightly cover it's edges and blend it with the project.

I'll be uploading the completed project soon. Try this easy distressing technique in your next project.

Friday, December 26, 2008

Love You

This is another DT project for Clear Scraps. I've used a Clear Scraps XL Dazed acrylic shape to create this layout. I've also used a small acrylic star to embellish this page too.
Here are the steps to it.
1) Use a Clear Scraps XL Dazed acrylic shape as the base for this page. Use a scrap to create a huge square masking template and use it to mask around it. Use various alcohol inks (denim, espresso, oregano and silver mixative) and some blending solution for this step. Outline the edges with a black paint marker or acrylic paint.
2) Use a white paint marker and draw a square in the middle of the page. Cut out a strip from a pattern paper and paste it at the bottom half of the page. (Notice that I've cut out part of the pattern paper before attaching the pattern paper.
3) Cut out another rectangular piece from a blue card stock and distress it using the scissors distressing technique. Ink it's edges with faded jeans distress ink and paste it on the upper half of the page.
4) Add a strip of Magic Mesh on the bottom of the page.
5) I've cut out various circles from a pattern paper to create all the circles on the upper right of the page. Add some liquid pearls and doodle on them with a white gel pen for details.
6) Distress the photograph using the scissors distressing technique and draw around the edges with a white gel pen. Paste it on the middle right of the page. Hand stitch with a crafting wire on the right of the photograph. Use the "Paint to Distress" technique on the lower right corner of the photograph.
7) For the upper left of the photograph, cut out a small square piece from a white card stock using a decorative scissors. Ink the edges with faded leans distress ink. Layer a small piece of Magic Mesh on top of it and finish it with a square brad.
8) Use a Clear Scraps small acrylic star as the base to create the star embellishment on the left of the page. Stencil another star in the middle of it using some white acrylic paint. Then, add some liquid pearls around the stenciled star. Stamp an image on it using a black solvent ink and lastly add a quote sticker to it.
9) Add a strip of rick-rack at the bottom of the page. Secure it with some brads on both ends.
10) For the piece with the word"wish", I've covered it with some crackle accents and added some black acrylic paint on it's edges. I've also add two brads to it for details.
11) The word "love you" are actually die cut words from cricut.
I love how this page turns out. It's great to create a masculine layout and funky layout once in a while. Hope you all like it.
Sources: Clear Scraps XL Dazed and Small Stars; Card stock: Bazzill; Pattern Paper: Imagination Project; Inks: Ranger Distress Ink, Ranger Alcohol Ink, Tsukineko Staz On; Stamps: Purple Onion Designs; Others: Ranger Liquid Pearls, Ranger Crackle Accents, Ranger Blending Solution, Uni-balls Signo Gel pen, Making Memories Acrylic Paint, Magic Mesh, rick-rack, brads, crafting wire, Helmar glue, Zip Dry, glue dots and other adhesives.

Tuesday, December 23, 2008

One & 2

This is my last DT project for Queenscraps. This project is created using their March Kit which unfortunately is also their last kit to offer.
Here are the steps.
1) Use the reverse side of the "Geometric" pattern paper as the base for this layout. Use the "Extreme Punching to Distress" technique to distress it.
2) Layer a piece of Making Memories Journaling Page in the middle of the page. Distress it using the punching and inking technique as above.
3) Cut out a strip from the "Die Cut Large Floral" pattern paper and distress it using the punching and inking technique. Paste it on the left of the above piece.
4) Distress the photograph using the punching and inking technique and cut a semi-circle out on the left of it to form a pocket look on it. Paste it in the middle of the page.
5) Cut a strip with a scallop edge from the beige card stock. Then cut semi-circles out from the scallop edge. Ink it with vintage photo distress ink and add some liquid pearls to it. Paste it on the bottom of the page.
6) Cut another strip from the reverse side of the "Floral" pattern paper. Ink it's edges with vintage photo distress ink. Use the "Extreme Punching to Distress" technique somewhere in the middle on the left of the strip. Paste it on the bottom of the page overlapping the above strip.
7) Hand stitch a rectangular in the middle of the page.
8) Create the hinge using the "Creating your Faux Metal Pieces" technique and add some mini brads to it before pasting it on the upper left corner of the photograph.
9) Use a piece of Heidi Swapp Ghost Frame (included in the kit) to layer on the lower left corner ad add some liquid pearls to it.
10) The number "2" is a chipboard piece which had been inked with distress ink and covered in crackle accents.
11) Use a 7Gypsies journaling tag (inked with distress ink) for journaling. Add some paper ribbon to it which I've distressed it using the punching and inking technique. Attach it with a Making Memories brad which is included in the kit. Insert this tag on the left of the photograph.
12) The word "ONE" had been cut out from the "Toile" pattern paper and attach to the page sing some foam adhesives. I've added some yarn on the "O" in the word.
13) The "&" are cut out from a beige card stock and ink with distress ink. Add some stitches to it's edges after attaching it to the page.
14) Draw, mask and doodle some circles on the lower right of the page and add some buttons which are included in the kit.
Hope you all like the effect of "Extreme Punching to Distress" technique. I've had a blast creating this page. Have a very Merry Christmas!

Sources: March Kit from Queenscraps: Card stock: Bazzill; Pattern Paper: Making Memories; Embellishments: Making Memories Journaling Page, Making Memories brads, Basic Grey buttons, Heidi Swapp Ghost Frames, 7Gypsies Journaling Tag; Others not included in the kit: Ranger Distress Ink, Ranger Liquid Pearls, Ranger Crackle Accents, Ranger Perfect Pearls, Basic Grey chipboard, mini brads, yarn, floss for stitching, Helmar glue, Zip Dry, glue dots and other adhesives.

Monday, December 22, 2008

Extreme Punching to Distress

This is the technique that I've used in my last project using Queenscraps March Kit. Before I share the completed projects, I would liked to share this technique. Previously I've shared this technique on photographs and flowers. This time, try to use this technique to the extreme!!
Use it as much as you can on one layout. Punch on the edges of the photographs, embellishment and pattern paper . Even in the middle of the card stocks. Have and go wild with the punching to distress technique. Remember to add distress ink to all the punched areas for a smooth distressing look. I'll be posting the completed project tomorrow. Try it and have fun!!!

Sunday, December 21, 2008

You're My Friend Forever Card


This is my third project using Queenscraps March kit. I just love the muted tones in this kit and can't resist to create a card with it.
Here are the steps.
1) Use a white card stock as the base for the card.
2) Cut a strip from the beige card stock included and ink it's edges with vintage photo distress ink. Paste it on the left of the card.
3) Add a piece of Making Memories Journaling Page (included in the kit) on the middle of the card. Ink it's edges with vintage photo distress ink.
4) Hand stitch the left border of the journaling page with some yarn.
5) Add a strip of lace on the across the layers above.
6) Cut out some leaves and flourishes from the "Die Cut Large Floral" pattern paper and paste it on the card. Cut some flowers from the "Die Cut Geometric" pattern paper and ink it with vintage photo distress ink. Paste it all around the leaves and flourishes. Add some Stickles and liquid pearls to it to dress it up.
7) Lastly, stamp your sentiment using solvent ink on the journaling page.
Isn't this a very simple card? I really love how the pattern paper makes my designing so much easier...lol! Happy Holidays and Merry Christmas everyone!
Sources: March Kit from Queenscraps: Card stock: Bazzill; Pattern Paper: Making Memories; Embellishments: Making Memories Journaling Page; Others not included in the kit: Ranger Distress Ink, Ranger Liquid Pearls, Ranger Stickles, Tsukineko Staz On, Queen Kat Designs stamp, lace, yarn for stitching, Helmar glue, glue dots and other adhesives.

Friday, December 19, 2008

You Are Mine


This is my second project using Queenscraps March Kit. This is a layout about Chloe and his daddy. She is such a daddy's girl.
Here are the steps.
1) Use a piece of white card stock included in the kit as the base for this page. Distress and ink it's edges with vintage photo distress ink.
2) Cut a scallop strip from light brown card stock and ink it with vintage photo distress ink. Paste the scallop strip on the right of the page and the negative on the left border.
3) Cut another rectangular piece from the "Flocked Brocade Stripe" pattern paper and paste it slightly overlapping on the left of the light brown scallop strip.
4) Stamp a circle (included in the kit) using olive green solvent ink on the upper left of the page.
5) Hand stitch around the photograph and paste it in the middle of the page. Remember to leave an opening on the left of it for inserting a tag later.
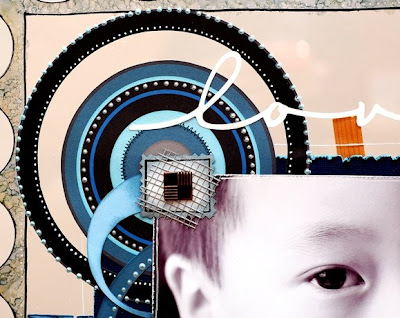
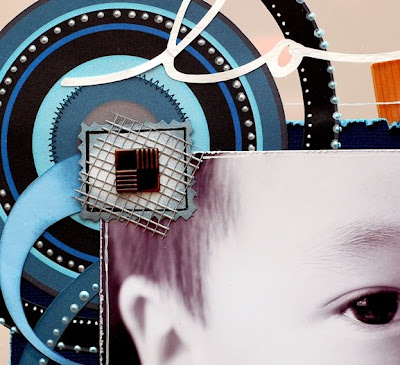
6) Cut another rectangular piece from the "Die Cut Geometric" pattern paper and ink it with peeled paint distress ink. Add some liquid pearls on the flower centers of the pattern paper. Paste it to cover the seam between the photograph and the "Flocked Brocade Stripe" pattern paper. Hand stitch some zig-zag stitches on it's left edges.
7) Cut a stem from the brown card stock included in the kit and ink it with black soot distress ink. Paste it to the page. Cut out some flowers from the "Die Cut Geometric" pattern paper and paste it all around the stem. Add liquid pearls to them. Cut out some Prima crystal swirls (included in the kit) and paste it around the flowers too. Add a brad (included in the kit) on the top end of the stem.
8) Add the "Remember" tag on the bottom of the page. Ink it with vintage photo distress ink first and add your title on it. To embellish it, add a huge button (included in the kit) on it.
9) Use another tag to journal on and insert it in on the left of the photograph.
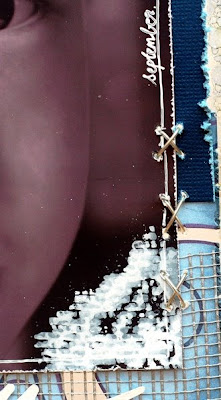
10) Cut three small squares from the reverse side of the "floral"pattern paper , the "toile" pattern paper and it's reverse side. Ink their edges with vintage photo distress ink and hand stitch them to the upper left corner of the page.
11) Lastly, stamp some butterflies (included in the kit) on vellum and cut it out. Fold the butterflies for some dimensions and add liquid pearls and Stickles to them. Paste them around the flower.
I bet everyone is busy preparing for Christmas and doing some last minute shopping now. It just feels so good during this time of the year. It's not celebrated that huge here in Malaysia and we don't have any snow at all....lol! I missed the cold weather!!
I'll be posting more projects using Queenscraps March kit on the next few days. Happy Christmas shopping!!
Sources: March Kit from Queenscraps: Card stock: Bazzill; Pattern Paper: Making Memories; Embellishments: 7 Gypsies Tags, Making Memories brads, Inkadinkado Stamps, Prima Say it in Crystals, Basic Grey buttons; Others not included in the kit: Ranger Distress Ink, Ranger Liquid Pearls, Ranger Stickles, Tsukineko Staz On, Heidi Grace stamp, Urban Lily Rub-ons, vellum, twines, zig pens, floss for stitching, Helmar glue, glue dots and other adhesives.

LinkWithin

Blog Widget by LinkWithin