Friday, April 30, 2010

Ryan Banner

 
This is a banner that I've create to hang on Ryan's bed. I've used the acrylic train set and two acrylic star from Clear Scraps to make this banner. If you all remember, I've previously created a banner for Chloe's bed and now, Ryan wants one too.

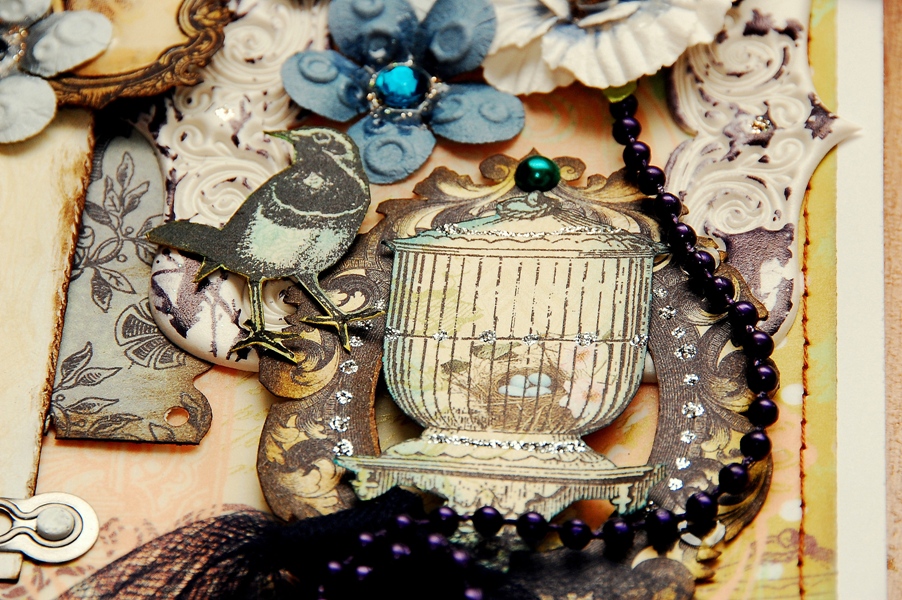
Here are the details on each piece of the banner. 


In each piece of the banner, I've stamped on it using some stamps and solvent ink. I've used some magic mesh, cardstock and cut-outs to create layers on it. To dress it up I've used some liquid pearl, buttons and rhinestones.

I hope you all like this banner and use it as an inspiration to create something during this National Scrapbook Day weekend!

Recently, I've been in some very down situations. I do hope that all of these would be over soon. Perhaps this NSD weekend would do some miracle! Have a blasting NSD!!


Sources: Clear Products: Clear Scraps; Cardstock: Bazzill; Pattern Paper: Hot Off The Press; Inks: Ranger Distress Ink, Tsukineko Staz On; Stamps: Stampers Anonymous, Making Memories; Others: Magic Mesh, Ranger Liquid Pearls, Copic Markers, Tim Holtz ideo-ology grungeboard, K&Company chipboard buttons, Jenni Bowlin Rub-ons, American Crafts vinyl alphas, Zig Painty, rhinestones, mini brads, ric-racs, buttons, ribbons, Glue Dots, Zip Dry and other adhesives. 

Thursday, April 29, 2010

Contest At Clear Scraps!

Clear scraps is having a fast and easiest contest ever! The deadline is 1st of May! So, go on over and check it out now at The Clear Scraps Blog. Good Luck everyone!

Wednesday, April 28, 2010

Distress Ink Flower

This is a very easy and simple technique that I've used recently in one of my project. This technique will make your paper flowers look more realistic. Just like the real preserved dry flowers. Just follow the simple steps below.

1) What you need is a paper flower, a distress ink pad and a mini mister with water in it.

2) Hold the paper flower and lightly swipe it on the surface of the distress ink pad. This will give a hint of distress ink on the paper flowers. You can leave the flowers at this stage and use it as a distress flower in your projects or you can take it another step further.
3) Use a mini mister with water and mist it directly on the flower. Make sure you get a good amount of mist on it. You could see how the distress ink smear and blend on the flower petals. 

Isn't this easy and pretty! Try this technique using different colours of distress ink or different colours of paper flowers. I love this technique a lot and will be using it more often in all my recent projects.

Monday, April 26, 2010

A Blessing at The Crop Spot!

Are you ready for this week's tutorial at The Crop Spot? This week's technique is really simple! The question that should be in your head now would be, "how could a little simple technique such as 'cutting" be interesting and help to create a full layout?" Yes! This week's technique would be "CUTTING". I know a lot of you dislike to hold you scissors that much but trust me, it's worth every minute of it with this tutorial. So, go on over and check out my project for this week at The Crop Spot which features the super beautiful paper line by Anna Griffin! Have fun cutting! Ps: Get those small cuticle scissors ready! Feel free to sign my guestbook and say hi!

Sunday, April 25, 2010

Hiro is 48 Weeks already!

This week, Hiro is 48 weeks already! Do you all remember about the "chewing frenzy" that occurred about a week or two ago? If you look closely at the picture above, the victim is the cabinet behind him which is our rotating TV cabinet. Even after using the furniture marker, you could still see it up close but it's the best we could do for now. If we need to really get rid of the markings, I think the cabinet needs to be fully refurbished.


After that incident, whenever we are busy or leaving him alone, we will give him some chewing treats such a the small bone in the above pictures. It is an edible bone which will soften when wet and won't leave sharp edges that might cut his mouth. This bone will keep him busy and won't think of chewing up our furniture. Besides that, the treat stuffing or hiding games are played more often. Hope that his chewing frenzy will be over soon!!

I've also created a separate page on his pictures for all of you, Hiro fans out there! This way, it will be easier for you all to check on his pictures when ever you want. I will update that page weekly too. Hope you all have a great weekend!! Woof! Woof!   

Friday, April 23, 2010

Love One Another Mini Album

This is a mini album that I've designed for Accent Scrapbooking. I've used the black and white acrylic tab album from them to create this mini album. Isn't it elegant? Accent Scrapbooking is a company that manufacture cast acrylic products. 

Here are some pages in this mini album.


Some details on the mini album.


This mini album is featured at Accent Scrapbooking new blog right now. Feel free to head on over to leave some love on this mini album. Have a superb weekend!

Sources: Acrylic Products: Accent Scrapbooking, Clear Scraps; Cardstock: Bazzill; Pattern Papers: Basic Grey, Pink Paislee; Inks: Ranger Distress Inks, Tsukineko Staz On; Stamps: Prima; Rub-ons: Heidi Grace, Basic Grey, Hambly; Others: Ranger Stickles, Fancy Pants lace and ribbons, 7Gypsies metal embellishment, Accent Scrapbooking flowers, Prima flowers, Prima pearls, Creative Impressions ribbon, mini brads, Zip Dry, Glue Dots and other adhesives.

Thursday, April 22, 2010

Next Teaching Trip!

It's time for me to make this official announcement here! My next teaching trip will be to Singapore!! I'll be teaching two workshops at Made With Love in Singapore! For those of you nearby or planning to take some workshops with me, check out the details by clicking on the "CLASSES" page above. Be one of the early birds and enjoy some discounts. Hope to meet you all there!!!

If you've noticed, I've added some page tabs on top of my blog to make it easier for you all. No more searching for my email and contact around.

Wednesday, April 21, 2010

Life's Portrait

This is the last layout that I've created using Swirlydoos April kit, "The Park Avenue". I really love this photograph because it tells so much about both my kids.

Here are the details.
 I've cut out the frame with the word "Life's Portrait" from the pattern paper and use it as the title of this layout. I've inked it's edges with distress ink first and detail it with rhinestones.
 I've also cut out another tag from another pattern paper and use it to write down the date.
 I've stamped the vinyl frame with a texture stamp and black solvent ink.

I've tied some netting to the frame and arranged it at the bottom of the layout to the left. Use the beads to dress it up and hold the netting together.
 
I've painted the center of each flower with some Shimmerz and dress it up with some Stickles and rhinestones.

I've cut out the bird cage and the frame from the pattern paper and layer them on the lower right of the layout. I've also stamp a bird onto a white cardstock and cut it out to attach to the right of the layout.

 I've cut out the whole flourish or vine with a chandelier attached at the end from the pattern paper. Ink the edges with distress ink and attach it to the left. Dress them up with Stickles and pearls.


I've added a strip of lace on the left of the layout.

Hope you all find this layout inspiring! Swirlydoos May kit is on it's way here and I can't wait to work on it. Hope you all are still following my mini album tutorials at The Crop Spot throughout this week and have a creative week!

Sources: Products included in the kit: Pattern Papers: Robin's Nest, Webster's Pages; Embellishment: Webster's Pages Vellum, Prima pearls and crystals, Prima lace, 7Gypsies photo turns, Pink Paislee Artisan Elements, Prima flowers, Shimmerz, beads, tulle; Others not included in the kit: Bazill Cardstock, Ranger Distress Ink, Ranger Stickles, Tsukineko Staz On, Stampers Anonymous stamp, Anna Griffin stamps, mini brads, floss for stitching, Glue Dots, Zip Dry and other adhesives.

Monday, April 19, 2010

Ready for another Mini Album tutorial?

This week's project at The Crop Spot is a unique mini album created using both Clear Scraps Chloe Vintage Frames and Jenni Bowlin's mini book. How did I managed to merge this two together and create a one of a kind mini album? Check it out at The Crop Spot today! This mini album also features the beautiful paer line of "I Do" by American Crafts. Enjoy!

I'll continue to share my fourth project using Swirlydoos April Kit soon. Check back for it!

LinkWithin

Blog Widget by LinkWithin