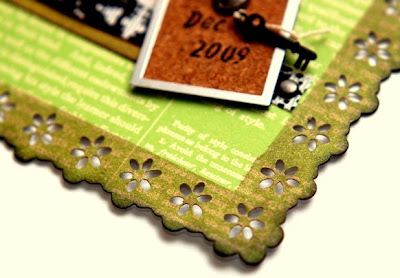
.JPG) This is my last layout using Scrapmagie's February Kit (Terem Palace). I really love how she had included so many gorgeous die-cuts and pattern papers in this kit. These papers are so inspiring to me.
This is my last layout using Scrapmagie's February Kit (Terem Palace). I really love how she had included so many gorgeous die-cuts and pattern papers in this kit. These papers are so inspiring to me.Here are the steps.

1) Use the die-cut pattern paper as the base for this page. Use the "Masking to Create Instant Frame/Layer" technique to create the frame around the paper.

2) Cut out a strip from a pattern paper and punch on it's right edges to create the notebook paper look. Ink it's edges with distress ink and paste it to the page.
3) Cut another strip from a decorative edge pattern paper and ink it's edges with distress ink. Paste it on the page slightly overlapping the strip above.

4) Stencil a tag shape using distress ink on the left of the page and attach a damask sticker (included in the kit) on top of it.

5) Punch along the right edges of the photograph and distress it's upper and right edges using a sanding block. Paste it on the page.

6) Use the "Crackle Effect on Frames and Tags" technique to create the huge crackled frame and attach it to the page with some brads.


7) Add a strip of ribbon on the bottom of the page and add some embellishments on the lower right corner. I've actually hand written some messages for Ryan to read a year later and put it in the little bottle. He is so excited about this and can't wait to read it....lol!
8) Mat some words stickers onto card stock and cut it out. Paste it to the lower left using foam adhesives.

9) I've cut out the "SON" from pattern paper and ink it's edges with distress ink. Attach them to the page using foam adhesives.

10) The word "shine" had been cut out using some raw chipboard and dress up with a yarn tying them together with the bottle on the lower right of the page.
I've had so much fun playing with the techniques on this page. Hope you all try it too!

Sources: Scrapmagie February's Kit (Terem Palace): Pattern Paper: Creative Imaginatins, Making Memories; Embellishments: Little Yellow Bicycle ribbon, Heidi Swapp Damask Sticker, Little Yellow Bicycle die-cut stickers; Others not included in the kit: Ranger Distress Ink, Ranger Liquid Pearls, Making Memories Acrylic Paint, crackle solution, Zig Writers, chipboards, small embellishments, brads, yarn, Helmar glue, Glue dots and other adhesives.

17 comments:
love it!!! :)
Thats awesome Irene. Love the notebook look on the photo. And the little test tube too. Very cute.
Hugs
Gayatri xx
This is so cool!! Love the little message in a bottle! You never cease to amaze me!!
brilliant! YOU ROCK :)))))))))))))
Wow...!! Absolutely FAB!!
Superbe !!!!!!!!
Bizzzzzzzzzzzz
OH MY...... This is simply STUNNING!!!! Love all the techniques and details. And I love how you pick up the red, of your son's shirt, to bring it back in the lettering.... AWESOME page Irene!
this is a really beautiful layout irene! i love the yarn over chipboard and the message in a bottle! :)
Love the bits of string wrapped around the title :) And the color scheme is pretty yet masculine.
Gorgeous! I am going to try some of these techniques! Thanks for being such an inspiration!
Another master piece with so many elements flowing in dimensional harmony.
Thanks Irene for the awesome tutorial on your layout.
connie paxman
AWESOME!!!! Perfect Lo and fantastic tutorial. TFS!! I LOVE IT!
Awesome!
Love it!!
I've tried to lift an other layout from you, but that was of couorse not easy. But it gave me of inspiration.
Thanks.
You can see it here:
http://acinom1972.blogspot.com/2009/02/e-lift-av-en-av-mine-favorittscrappere.html
beautiful !!!
I love all of it ;
great details !!!
This is beautiful!!!
I love all of it ; great details !!!
Beautiful layout ...Again!!!!
Post a Comment