Sunday, August 31, 2008

Birthday Cake Card


This is just a little fun card that had actually been inspired by Serendipity's challenge for August. There challenge is to build a cake on a layout. I just thought how fun! I also see some cake cards in some forum galleries these days and thought I would try to create my version of it.
Here are the steps.
1) I've hand drawn my own template. Feel free to use it but try to tilt it a bit because my camera is not taking a straight pic of it. But it would be fun too to have a one sided tilted cake too...lol!
2) Trace the cake template to a pattern paper and cut it out. Ink the edges using tattered rose distress ink. I've used some trims and laces to separate the sections of the cake. You could use glue dots to attach your trims or laces to it.

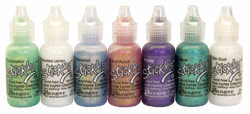
3) Stamp the lower section with a flourishes stamp. Use Stickles to doodle all over the cake for some bling and I've added sequins to the small lace flowers for details. Use a wide sheer ribbon to tie a bow and add a flower in the center. I've used the "Freshen Up your Flowers" technique to create some water droplets on the flower.
4) Trace the overall template on another card stock and cut it out. Paste the pattern paper cake on top of the cut out card stock and you will have your cake on display. Ink the leg with black soot distress ink and add some Stickles to it.
This is such a fun cake card and you can definitely create this kind of card for anniversary or even invitations.
Sources: Card stock: Bazzill; Pattern Paper: Imagination Project; Stamps: Autumn Leaves; Inks: Ranger Distress Ink, Tsukineko Staz On; Brads: Making Memories; Others: Ranger Stickles, flower, sequins, black paint marker, Ranger Glossy Accents, ribbon, trims, lace, glue dots and other adhesives.

Saturday, August 30, 2008

I'm nominated as one of the Best Hobby Blog!

Woohoo! One of my reader had nominated me as the Best Hobby Blog at Blogger's Choice awards 2008. Thanks Tejal! If you wish to vote for me, just click on this link

"Blogger's Choice Awards" or the badge on the right of my blog!

Thanks for all your support! I love all my readers! Hugs!

Friday, August 29, 2008

Net Stitching

This is just another hand stitching technique that I've used in my recent project. Well, I must admit that I do tend to hand stitch a lot in my projects. It's partly because I do not own any sewing machine...lol! Secondly, I love the versatility of using hand stitching.

Here are the steps.
1) Draw two circles using a pencil on your project. One of the circle needs to be bigger than the other. Then, layer your page on top of a piece of crafting foam and start poking holes (on both circles) using a needle or pin to make your stitching holes before actual stitching. When you start to stitch, remember to stitch diagonally as the picture above in one direction.
2) After you've finished one whole circle with step 1, stitch the opposite direction with the same stitches.

3) When you're finished, you've get a net stitching look. I've used two different colours of floss to do my stitching for a dual tone stitching effect. It didn't show much in the picture above but you'll get an awesome effect with it. I've used a grey and blue floss in my project.

You can also experiment using this technique with different shapes ie. square, rectangle, oval etc. Try it! I'm sorry but you all would have to wait till mid Sept to see the finish layout.

Thursday, August 28, 2008

Doodling with Stickles


What is Stickles? I have received quite a few emails asking me this question. I think it's because I used it so often in my projects and I've forgotten to post a brief description about this product. Stickles is a cool product manufactured by Ranger Ink. They are actually glitter glue which comes in bottles with an awesome fine flow tip and in variety of colours. It's so easy to use and give a vibrant sparkle effect to your projects.


I have been using it to add a little sparkle to my projects. Lately, I've even used it to doodle on my projects. The fine flow tip allows you to draw, dots and embellish on any of your work. It can be used on most surfaces ie. paper, transparencies, acrylics, metal, foams, leather, fabric etc.

It can be so addictive once you start to use them. Try them!

Pandora's Willow Tree is OPEN!

Woohoo! Pandora Willow Tree is finally OPEN! So head on over to check out all the cute magnolia stamps they have! They're the first to carry magnolia stamps in the states.

"Pandora's Willow Tree"

Wednesday, August 27, 2008

Precious


This is a layout about Chloe and how much she had grown in that photograph. She is almost two now! Time does flies! The inspiration for this page came to me when I think of how much she had blossom into this little girl today.
Here are the steps.
1) I've used the "Flowers and Butterfly" pattern paper from K and Company's Blue Awning line as the base of this page. It's a left over from my Queenscraps August Kit. Distress the edges of the paper using the scissors distressing technique and ink it with vintage photo distress ink. I've fold down the upper right corner of the paper and attach a chipboard button which is also from the kit to it.
2) Create a rectangular stenciling template from any paper (negative of a rectangle mask) and stencil a rectangle using the "Perfect Medium as Resist" technique directly on the base pattern paper.
3) Add a strip of adhesive paper ribbon (also from the kit) on the left of the layout.
4) Distress the photograph using the scissors distressing technique and ink with vintage photo distress ink. Use the "Perfect Medium as Resist" technique to create the flourishes in the left and bottom border of the photograph. I've apply a flourish rub-on on the lower left corner of the photograph. Use a white doodling pen and some glitters (Stickles) to add details to it.
5) Use the "Random Stitches" technique to hand stitch between the photograph to the adhesive paper ribbon.
6) I've used the "Creating your Faux Metal Pieces" technique (Green Patina, Pewter and Blue Patina) to create the photo anchor on the upper left of the layout.
7) I've stamped a circle and some butterflies on the right of the layout.
8) I had painted the huge stalk of flowers using some acrylic paints and add some glitters (Stickles) and doodling for details.
9) Add a strip of rick-rack on the bottom of the page using staples and a flower to anchor it on the left.
10) I've also used a chipboard plate which I've treated with some "Perfect Pearls" (Green Patina, Pewter and Blue Patina) to give a faux metal look to it. Add loads of flowers to it and added freshness to the flowers using the "Freshen Up your Flowers" technique.
11) The huge butterfly is actually a huge ghost butterfly by Heidi Swapp which I've stamped and doodled and added glitters (Stickles) for details. I've create an antenna for it using some crafting wire.
12) I've done my journaling in a spiral within the stamped circle.
I hope you all like this layout and the techniques used on it. It has been a very experimentative layout for me and I love the effect!
Sources: Card stock: Bazzill; Pattern Paper: K and Company; Stamps: Inkadinkado, Autumn Leaves, Making Memories; Inks: Ranger Distress Ink, Ranger Adirondack Ink Pad, Tsukineko Staz On, Ranger Perfect Medium; Rub-ons: Basic Grey; Brads: Making Memories; Chipboard: Fancy Pants, K and Company; Others: Ranger Perfect Pearls, Ranger Stickles, Prima Flowers, zig pens, uni-ball signo gel pen, rick-racks, fibers, acrylic paints (Making Memories), Ranger Glossy Accents, adhesive paper ribbon (K and Company), floss for stitching.

Tuesday, August 26, 2008

Random Stitches

Recently I'm also into hand stitching my layouts. Normally, I would stitch a certain stitch all across or alternate it with some pattern stitching. But when I was creating my recent layout, I'm so tired of repeating the same stitches and just thought I would love to have some fun! Stitch whatever stitch I want as I moving along the line. With that I've ended up with a more grungy or fun stitches.

Try it in your next project!

Sunday, August 24, 2008

Perfect Medium as "Resist"

I think I've promised that I will show you all how to use "Perfect Medium" as a resist ink. Here are a few experiments that I've done in my latest layout which I will upload soon.

In this first picture, I've stamped some flourishes using the "Perfect Medium" on a photograph. Then, ink over it using a sponge and some distress ink. It seems liked the "Perfect Medium" is working perfectly as resist ink here.

In the second pic above, I've also stamped some flourishes using "Perfect Medium" on a photograph. This time, I've use a sponge and some white pigment ink to lightly dab over the stamped images. The "Perfect Medium" picks up the white pigment ink and shows a subtle effect of the stamped images. I like this effect! Lastly, I've stamped some flourishes using "Perfect Medium" in a pattern paper. Then, I've inked around and all over the stamped images with a sponge and some distress ink. It does not show a very clear "resist" effect therefore, I've used a wet wipe and lghtly wipe the inks on top of the stamped images and it turns to this very cool looking subtle "batik" effect! How awesome is that! I will definitely be using this technique again in my future projects!

After these experiments, my opinions is that, it is preferably to stamp your images on a glossy, semi glossy or matte paper to get an awesome "resist" effect by using "Perfect Medium". If you're using a card stock or a normal paper base to stamp your images, make sure you apply a generous amount of "Perfect Medium" in your process of stamping and work with the inking above it quickly.

Hope this experiments would benefit some of you!

Friday, August 22, 2008

Your Delicacy


Finally, here's the finished layout using the techniques that I've shared this few days. It's a layout about Chloe and her yummy little thumb. Somehow, I can see how much she enjoys her "delicacy" in that photograph. Therefore, I've vision her in this gorgeous restaurant which chandeliers, lace table clothes and loads of jewel tones. That's how my inspirations comes!
Here are the steps.
1) I've used a white card stock as the base for this layout. Distress the edges using the scissors distressing technique and ink it with vintage photo and brushed corduroy distress ink.
2) I've used 3 sheets of pattern paper from the Basic Grey Mellow line to layer behind the photograph. All layers had been distressed using the scissors distressing technique and ink with frayed burlap distress ink.
3) On the first layer, stamp some details along the upper edge and add some lace flowers (which had been cut in halves and inked with distress ink) with mini brads. Use some glitters (Stickles) to add some bling to the stamped images.
4) Distress the photograph using the "Distressing your Photographs using Hole Punchers" technique and attach it to the middle of the page.
5) I've hand drawn a huge swirl on a pattern paper and cut it out. Ink the edges with distress ink and paste it to the bottom of the page.
6) Stencil and drawn some small circles all over the area around the swirl.
7) Distress the bottom of the page using the "Creating Distressed Marks" technique.
8) The flowers are created using the "Flowers using Perfect Pearls" technique and place all around the swirls.
9) The chandelier is actually a recycle packaging from my recent new stamp from Heidi Swapp. "Recycle your Clear Stamps Packaging" tip. Add lots of glitters (Stickles) to it for some glamour bling look. I've also stitched on the top of it to give the look of it being hang down from the top.
10) I've printed out the title from my computer and cut it out. Ink the edges using distress ink and attach it to the page using some foam adhesives for dimension.
This is such a fun layout to do for me as most of you know I just love to play with new techniques. I hope I've not disappoint anyone with this finished layout of mine. Happy creating remember, it's all about having fun too!

Sources: Card stock: Bazzill; Pattern Paper: Basic Grey, Scenic Route; Stamps: Making Memories; Inks: Ranger Distress Ink, Ranger Adirondack Ink Pad, Ranger Perfect Medium; Others: Ranger Perfect Pearls, Ranger Stickles, lace flowers, mini brads, zig pens, uni-ball signo gel pen, recycle packaging of Heidi Swapp clear stamp.

Thursday, August 21, 2008

Creating Distressed Marks

I bet most of you might have waited anxiously to see my finished layout using the last few techniques I've shared. But before I upload it, I would liked to share another technique that I've used on that layout. It's the "Creating Distressed Marks" technique. This is also a very simple technique and adds some cool distressed marks on your project.

Here are the steps.

1) Fold the area that you want to create your distressed marks against the edge of your table. This will create a folded line.
2) While it's still folded against the edge of your table, use a sponge with some distress ink and lightly rub against the folded edge to create a distressed mark on your page or paper.
3) Repeat the above steps as many times as you desire to create some distressed marks on your project.

This technique is so simple that anyone can do it in seconds. I will be uploading my finished layout in my next post. Keep an eye for it!

Wednesday, August 20, 2008

Distressing your Photographs using Hole Punchers

Some of you must be thinking, am I out of my mind?....lol! Well, when my husband sees me doing this, he asked the same question. My answer is, this is "me"!

To distress your photographs using this technique, simply just punch holes randomly on the corners of the photograph. Then, tear part of it away. Leaving a "chewed off " look on the edges. Ink the punched area with some distress ink.

It might not look great in the picture above and you might be a little hesitate to try this now. But I bet you'll like the effect when I upload my project tomorrow. It really adds some cool effects to your project.

LinkWithin

Blog Widget by LinkWithin