
.JPG) Here are the tutorials for page 7 and 8 of my Nature Mini Album where I've used Clear Scraps Clear N Chip set (Abbie's Love) to create.
Here are the tutorials for page 7 and 8 of my Nature Mini Album where I've used Clear Scraps Clear N Chip set (Abbie's Love) to create.Simply follow the steps below to create the pages as above.
Page 7:
1) Trace the shape of the chipboard page onto a pattern paper and cut it out. Use a Tim Holtz idea-ology mask and distress ink to mask a border on the right of the page. (Do not paste it on the chipboard page yet)
2) Ink the edges of the photographs with distress ink and add it to the pattern paper above. Run the left of the pattern paper through an embossing machine with an embossing folder. Ink the embossed images with distress ink. Paste this finished piece to the chipboard page.
3) Add some flourish rub-ons on the bottom of the page and a flower on the lower left of it. Detail the flower with pearl and Stickles.
Page 8:
1) Use an acrylic piece from the Clear N Chip set as the base for this page.
2) Add a strip pf vellum horizontally across the page. Cut out a huge flower from a pattern paper and add it to the middle of the page. Run this acrylic piece through an embossing machine and highlight the embossed images with a white paint marker.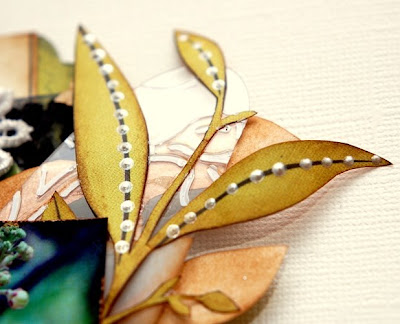
3) Cut out some leaves from a pattern paper and ink it's edges with distress ink. Add it to the right of the page. Dress up both the flower and the leaves with Liquid Pearls.
4) Ink the edges of both photographs with distress ink and add it to the page. use a white gel pen to doodle some faux stitches on the edges.
5) Add a flower on the top of the page and detail it with pearl and Stickles.
Hope you like today's tutorial. We're almost done with the album. I'll be sharing the last two pages and the back cover tomorrow. Have fun creating!
Sources: Clear and Chipboard products: Clear Scraps; Pattern Papers: K and Company; Inks: Ranger Distress Ink; Rub-ons: Basic Grey; Others: Tim Holtz idea-ology mask (Borderline), Ranger Stickles, Ranger Liquid Pearls, Uni-ball Signo Gel pen, EKSuccess Zig Painty, Prima flowers, pearls, Zip Dry, Helmar Glue, Glue Dots and other adhesives.


4 comments:
ooo this is so beautiful i must try it. :D thank you for sharing.
o wat is dit mooi ga ook eens proberen danks
You a Master!!!
WORK OF ART!!!!
Very beautiful! Thank you...
LOVE LOVE LOVE LOOOOVE your work!! I love distressing and all things Tim Holtz! Thank you for sharing all your talent with all of us!
I wanted to stop by and let you know that I have given your blog an award. You can pick it up on my blog. :)
http://letstalkexpression.blogspot.com
Thank you again for sharing your talent and ideas!
Post a Comment