.JPG)
Here we go with the first tutorial on my Nature Mini Album. I've used Clear Scraps Clear N Chip (Abbie's Love) mini album to create this.
Here are the steps.
1) Use a rectangular acrylic piece from the set of Clear N Chip as the base for the front cover of this mini album.
2) Outline the front cover with a silver and black marker. I've used some Zig Painty. You could use any paint marker to do this.
3) Cut out a rectangular piece from a vellum and ink it's edges with distress ink. Paste it in the middle of the cover.
4) Cut out another smaller rectangular piece from a pattern paper and ink it's edges with distress ink. Paste it on top of the vellum.
5) Run the cover through an embossing machine with an embossing folder. Lightly ink the embossed images on the vellum and pattern paper with distress ink.
6) Add a strip of lace all around the top, right and bottom edges from the back of the cover. Later, dress it up with some liquid pearls from the front.

7) Add a rub-on in the middle of the pattern paper and highlight it with a white gel pen.

8) The "N" is a cut-out being paste onto a chipboard and later ink it's edges with distress ink. Add a layer of Crackle Accents on top of it. The "ATURE" are rub-ons.

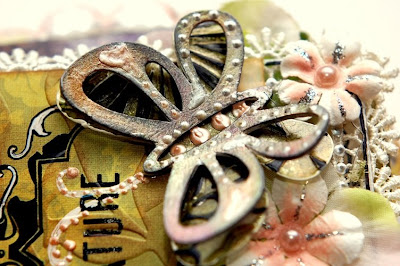
9) Use the acrylic butterfly included in the Clear N Chip set and run it through an embossing machine with an embossing folder. Ink it with alcohol inks and highlight the embossed images with black solvent ink.

10) Use a chipboard butterfly included in the Clear N Chip set and ink it with Perfect Medium. Add some Perfect Pearls to it and later mist some water to set it. Add it to the cover on top of the acrylic butterfly in step (9). Dress it up with Liquid Pearls.
11) Add some flowers to it and detail them with pearls and Stickles.
If you have not tried one of these Clear N Chip set from Clear Scraps, I think you should give it a go. It's such a fun mini album. You can create various combination of pages for a mini album or take it apart to make cards or use them on your layouts. It also come with some chipboard and acrylic embellishment. Try it!

Sources: Clear products: Clear Scraps; Pattern Papers: K and Company; Inks: Ranger Distress Ink, Ranger Perfect Medium, Ranger Alcohol Ink, Tsukineko Staz On; Rub-Ons: Hambly Print Screen; Others: Ranger Perfect Pearls, Ranger Blending Solution, Ranger Stickles, Ranger Liquid Pearls, Ranger Crackle Accents, Uni-ball Signo Gel pen, Prima flowers, vellum, pearls, lace, Zip Dry, Helmar Glue, Glue Dots and other adhesives.

10 comments:
Hi! I checked your blog first thing this morning hopeing this would be posted but alas I had to wait. This is going to be so much fun. I could not find this album but I have another alternative. I think it will turn out great. I'm off to start my album. Thanks for sharing.
Wauw wauw wauw, I love all your details!
Your album cover is absolutely gorgeous!! :)
fantastic album!!:)
Fantastic Irene. I love it all. I continue to be amazed at your talent.
Hugs Debbie xx
It's beautiful as always Irene! Thanks for the tutorial! ~xo Jess
Another stunning work of art Irene! Beautiful !
isax
Your work is so textural...it makes me want to touch it!
Wow, I love this! ♥
Waouhhhhhhhh ... I'll begin it this week-end. It's gorgeous Thanks Irène for sharing ... La Biz La Delf
Post a Comment