.JPG)
.JPG) Finally, here are some of the last pages and back cover of my Finland Mini Album which I've used Clear Scraps chipboard tab album and acrylic sheet to create.
Finally, here are some of the last pages and back cover of my Finland Mini Album which I've used Clear Scraps chipboard tab album and acrylic sheet to create.Here are the steps to page 8.
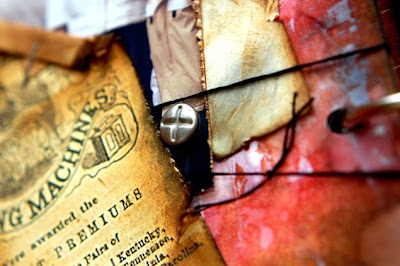
1) Use a white card stock as the base for the page. Use the "Distressing with Gesso" technique on it. Later sprinkle some drops of water on it to create the water distressing look on it. Paste it on the chipboard page.

2) Cut out another square piece from a white card stock and distress it using the scissors distressing, tear in and the "Create Old Vintage Distressed Papers" technique (use various colours of distress ink) on it. Attach it to the page and use a black pen to doodle on some stitches on it's edges.


3) Distress the photograph using the scissors distressing and tear in technique and ink it with distress ink. Add a brad to it and paste it to the page. Stamp an image using solvent ink on top of it.


4) The floss or string is from the design on page 7. Add a piece of vintage pattern paper on it after distressing it with the same techniques as above. Use a staple to fold up both it's upper right and lower left corner.
5) Lastly, add a label sticker for journaling.
Steps to page 9.
1) Use a pattern paper as the base for this page. Ink it's edges with distress ink. Paste it on the chipboard page.
2) Cut out a rectangular piece from a pattern paper and distress it using the scissors distressing and tear in technique. Ink it with distress ink and paste it at the bottom of the page.

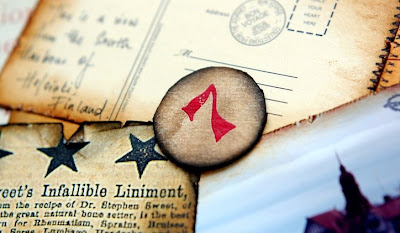
3) I've used a small envelope and postcard to layer at the top of the page. I've inked their edges with distress ink and doodle some stitches using a black pen on them. Stamp on the upper right corner of the envelope and use the postcard as your journaling space.
4) Distress the photograph using the same techniques above and ink it with distress ink. Paste it to the page and stamp a bird on it's right using solvent ink.

5) Add a small piece of vintage pattern paper which had been distressed. Cut out a circle shape chipboard and add a "7" rub-on to it. Ink it's edges with distress ink and add it to the page.

6) Add a vintage metal embellishment on the lower right of the page.
Steps to create the back cover.

1) Cover the chipboard piece with black card stock "Distressing with Random Magic Mesh" technique on it.

2) I've added a journaling tag which I've distressed using the "Create Old Vintage Distressed Papers" technique. Dress it up with some mini brads and paste it to the page.
As requested by some of you, I'll be posting another post with all the pages together for a full view of the album.
Sources: Clear Scraps Chipboard 6x6 Tab Album; Card stock: Core-dinations; Pattern Papers: Jenni Bowlin Studio; Inks: Ranger Distress Ink, Tsukineko Staz On, Stamps: Inkadinkado, Making Memories, Maya Road; Rub-Ons: Jenni Bowlin Studio; Others: Magic Mesh, Jenni Bowlin Studio label sticker, 7Gypsies mini postcard, chipboard, Zig Writers, Gesso, metal embellishment, staples, Helmar glue, Zip Dry, glue dots and other adhesives.


3 comments:
This is gorgeous ! Lovely work !
Domi
gosh..... there is so much to see, and to comment about.....
I truly love your work Irene.
It is soooo beautiful.
Love all those gorgeous details, like the stapled-down, corners.
as always... love your work♥
Post a Comment