Monday, September 20, 2010

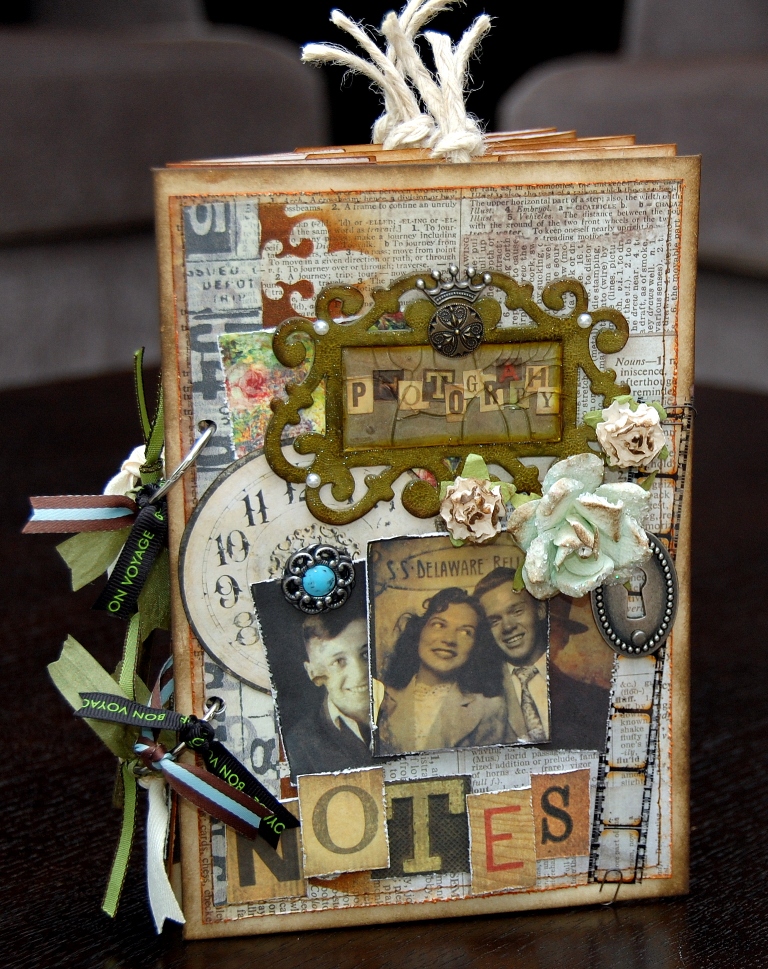
Photography Notes Album (Journal)

This week, I'll be sharing a full week tutorial based on the above project, "Photography Notes Album" at The Crop Spot! This journal features the cool grungy line of Tim Holtz idea-ology "Lost and Found" paper stack and it's metal embellishment! I've used the Melissa Frances Large Envelopes and Tag Album to create this book.

Here are some details on the cover.

Do check out this project at The Crop Spot and follow along the tutorials to create your very own journal. Enjoy!

Check back tomorrow for my first DT project for Bo Bunny!

Sunday, September 19, 2010

Hiro's Sunday!

This week, Hiro is due for his bath and his annual booster vaccination. We've postponed both to next week due to the frequent raining days here. We just don't want him to catch any sickness while he is weak after his vaccination. I'm a little nervous about taking him to this vaccination because normally most dogs would be weak and might experience some side effects after vaccinations. Do you take your pups or dogs to the annual booster vaccination? Share your experience with me.

Tomorrow, I'll be sharing another project which are totally inspired by Tim Holtz products! Check back for it!

Friday, September 17, 2010

Capture The Moment

This is a DT layout for Clear Scraps and Stamp Enjoy. I've used an acrylic tag by Clear Scraps and tons of stamps from Stamp Enjoy in creating this layout. The gorgeous paper line is by My Mind's Eye.

Below are some close-ups of this layout.
I've masked a flourish on the bottom of the page using Tim Holtz mini florets masks and distress ink.

This cute little stamp image is by Stamp Enjoy. I've colour it using Copic markers.

I've used the "Stitching for Fancy Design" technique in the close-up above.

I've inked the edges of the Clear Scraps acrylic tag with alcohol ink. Later, I've stamped on it, added cut-outs on it and apply droplets of Viva Decor dimensional pearls on it. 


I've enjoyed working with the bright and fun colours with this layout. Hope you all like it!

This week, I'm also featured as the guest design at Sketchabilities! Check out my work for them!
Sources: Clear Products: Clear Scraps; Cardstock: Bazzill; Pattern Paper: My Mind's Eye; Inks: Ranger Distress Ink, Tsukineko Staz On, Ranger Alcohol Ink; Stamps: Stamp Enjoy; Others: Viva Decor pearl pen, Ranger Glossy Accents, Copic markers, brads, ribbon, floss for stitching, Zip Dry, Glue Dots and other adhesives. 
Wednesday, September 15, 2010

Stitching For Fancy Design

This is an easy yet fancy looking design technique. In one of my layout, I've tried to avoid adding flourishes behind my cut-out flowers. But without it, the flowers would look too small and and not interesting at all.

Therefore, I've thought to make it bigger by stitching some straight lines in three different directions using different colours of thread. Before stitching it, I've also mist some ink on that area. This would create an explosion look on the flowers. For more details, I've also added some dimensional pearl in dots of different sizes.

Isn't that fun! Try it!

Tuesday, September 14, 2010

We Inspire

This is a layout that I've created using Swirlydoos past kit, Shabby Ambition. I've used some acrylic circles from Clear Scraps with some fun techniques in creating this layout.

Below are the details and some close-ups on it.

I've used a Layers Of Color, template to create the masking or stenciling on the background with various distress ink.

I've covered the back of an acrylic circle with a pattern paper cut-out and highlight it's edges with Copic Markers.

I've cut 2/3 of the acrylic circle and embossed it using a sizzix machine and Tim Holtz Alterations texture fades embossing folders. Later, I've inked the embossed images with solvent ink and highlight it's edges with Copic Markers.

 I've created these flowers using some cardstock, distress inks and glimmer mist. I should remind myself of taking some steps pictures when I create these flowers again.
I've used some Crackle Accents to cover part of the background image.

I've had tons of fun playing with the techniques while creating this layout. Hope you all will try it too!

Sources: Products included in the kit: Pattern Paper: IOD; Embellishment: Prima pearls and lace, IOD Stickers, Websters Pages Bloomers; Others not included in the kit: Bazzill Cardstock, Tattered Angels Glimmer Mist, Clear Scraps acrylic circles, Tim Holtz embossing folder, Copic markers, Tsukineko Staz On, Ranger Distress Inks, Ranger Crackle Accents, Ranger Liquid Pearls, Ranger Stickles, Zig Writer, Layers of Color art template, American Crafts Thickers, Glossy Accents, Zip Dry, Glue Dots and other adhesives.    

LinkWithin

Blog Widget by LinkWithin
