Here are the steps to it.
1. Get a small circle paper doily and cut it's center out.
2. Make one snip of the ring of paper doily.
3. Fold pleats all the way around the paper doily to make it into a smaller ring. You can ink it's edges with distress ink if you want to.
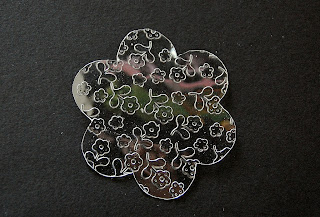
4. Use a small acrylic flower and run it through an embossing machine such as Sizzix or Cuttlebug. (Note: I've used a Clear Scraps acrylic flower but you can get a sheet of acrylic and cut out a flower from it using a die-cut machine or your scissors.) After embossing it, use a solvent ink pad such as Staz on or Archival Ink and lightly dab on top of the embossed images.
Note: For this flower technique, you could always reduce the layers to create smaller or medium size flowers. This would give you a great combination of flowers for your projects.
Hope you all like this simple technique. Try it!


16 comments:
Wow! This is goreous, Irene! you totally amaze me with your creativity!
What a creative idea! Love it!
Hi Irene, I love it!!, it's a very beautiful flower!!!!
Beautiful! Truly the best I have seen in awhile.
very unusual!
cool))
love it, Irene!!
Very nice! this is great!
Lovely flowers ! thank you for sharing it with us
Beautiful flower Irene. I love the way you layered the different textures. Congrats on the blog post birthday too. Hugs
OMG this looks amazing, what a beautiful flower. Think I will look up my paperdoilies and try to make one too...TFS, hugs, Wendy.
Amazing!
Thanks for sharing! I'll try to make one of this beautiful flowers!!!
Hugs from Brazil!
What a wonderful technique, Irene!!!! Thanks so much, I have to try this one!!!!
Thanks for sharing this beautiful flower tutorial!!!
Hugs,
Valeria Vac
Fabulous and amazing tutorial.. love this vellum floral one.. beautiful. TFS
superbe ,merci pour le tutoriel
bisous
Superbe tuto merci
Bisous de France
Post a Comment