.JPG) This is my second layout using Swirlydoos September kit "Bejeweled". This is a fast and simple page using some medium and cutting.
This is my second layout using Swirlydoos September kit "Bejeweled". This is a fast and simple page using some medium and cutting.Here are the steps:
1) Use the cardboard piece included in the kit as the base for this layout. Cut the cardboard into a huge circle and tear part of it's surface to reveal the corrugated texture within it. Paint the cardboard with some acrylic paint and crackle paint. Later, ink part of it with some dark colour distress ink.
2) Cut out a strip from the pattern paper and distress it's edges using a scissors. Ink it with distress ink and add it horizontally on the page.
3) Cut out a huge rectangular piece from another pattern paper and distress it's edges. Ink it with distress ink. Add it vertically on the right of the page.
4) Print the photograph onto a white cardstock and distress it's edges. Punch a row of holes on the right edges and tear part of it to further distress it. Ink all around it with distress ink. Cut out a small circle masking template from some scraps and use it to mask the circles on the photograph. Later, dress up the circles with some pearlized accent ink (included in the kit). Add the photograph to the middle of the page.
5) Ink the die cut fence included in the kit with some distress ink and add it to the bottom of the page. Detail it with a rub-on lock and doodle it with a brown pen.
6) Cut out some clocks from the pattern paper and ink it's edges with distress ink. Add it to the lower left of the page with some foam adhesives for dimensions. Dress them up with Stickles and a dew drop.
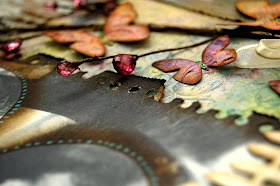
7) Add the jewel branch on the right of the paper and hand stitch it with some cross stitches to keep it in place. Add a ribbon below it and cut out some butterflies from the pattern paper and add it all around the branch. Detail them with Stickles.
8) Add some dew drops on the upper left corner of the photograph.
9) Ink the chipboard alphas included in the kit with distress ink and highlight the left of each alpha with pearlized accent ink and Stickles. Add it to the left of the photograph. Also add a strip of lace rub-on on the bottom of it and dress it up with Stickles.
Hope you all like this layout. I've not been feeling good recently as Hiro is having a tummy infection. He is not eating well and has diarrhea since Sunday. We've took him to the vet and he has been given a jab and some medication. We're praying that he recovers soon. It really hurts to see him loosing some of his weight.
I also hope that for those of you who are following my tutorials on The Crop Spot this week, do follow it till end of it because there will be a huge surprise giveaway waiting for you!! Make sure you all keep an eye for it!
The Scrapbooking Session at YWCA, Penang would be on this Friday (25th Sept) (2.30pm till 4.30pm). This would be a small crop and sharing session. Mark your calendar and come and join us. For more details, you could refer here.
Sources: Products included in the kit: Pattern Papers: Prima; Inks: Clearsnap; Embellishment: 7gypsies (chipboard alphas), Kaisercrafts (rub-ons), Swirlydoos (Die cut fence), Prima jewel branch, Robin's Nest (dew drops); Others (not in the kit): Bazzill cardstock, Ranger Stickles, Ranger Distress Ink, Ranger Crackle Paint, Making Memories Acrylic Paint, floss for stitching, ribbon, Zip Dry, Glue Dots and other adhesives.


OMG!! So Gorgeous!!! I love it!!!
ReplyDeleteLove how you hi-lighted the individual letters. :)
ReplyDeleteWOW!!!!! just WOW!!!!!!
ReplyDeleteThis is so great. I bet the kids love having a puppy. I love the way you did the photo.I have to remember to try that. I hope Hiro is getting better. I'm off to work on my Mini. Love the cover.
ReplyDeleteYou never fail to amaze me with your layouts. The tutorials make it sound so easy, but the hard part is coming up with the ideas in the first place. Appreciate the time and effort you put into sharing your ideas and techniques with others....
ReplyDeleteSue x
simple? maybe - but the effect is amazing!
ReplyDeletelove your dog, by the way :)
This is cool, I actually got the kit so am eager to try it. Cheers for the input, always amased with your work.
ReplyDeleteThanks Heeps