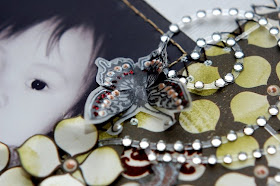
This is my second project using Queenscraps March Kit. This is a layout about Chloe and his daddy. She is such a daddy's girl. 


Here are the steps.
1) Use a piece of white card stock included in the kit as the base for this page. Distress and ink it's edges with vintage photo distress ink.
2) Cut a scallop strip from light brown card stock and ink it with vintage photo distress ink. Paste the scallop strip on the right of the page and the negative on the left border.
3) Cut another rectangular piece from the "Flocked Brocade Stripe" pattern paper and paste it slightly overlapping on the left of the light brown scallop strip.
4) Stamp a circle (included in the kit) using olive green solvent ink on the upper left of the page.
5) Hand stitch around the photograph and paste it in the middle of the page. Remember to leave an opening on the left of it for inserting a tag later.
6) Cut another rectangular piece from the "Die Cut Geometric" pattern paper and ink it with peeled paint distress ink. Add some liquid pearls on the flower centers of the pattern paper. Paste it to cover the seam between the photograph and the "Flocked Brocade Stripe" pattern paper. Hand stitch some zig-zag stitches on it's left edges.


7) Cut a stem from the brown card stock included in the kit and ink it with black soot distress ink. Paste it to the page. Cut out some flowers from the "Die Cut Geometric" pattern paper and paste it all around the stem. Add liquid pearls to them. Cut out some Prima crystal swirls (included in the kit) and paste it around the flowers too. Add a brad (included in the kit) on the top end of the stem.

8) Add the "Remember" tag on the bottom of the page. Ink it with vintage photo distress ink first and add your title on it. To embellish it, add a huge button (included in the kit) on it.
9) Use another tag to journal on and insert it in on the left of the photograph.

10) Cut three small squares from the reverse side of the "floral"pattern paper , the "toile" pattern paper and it's reverse side. Ink their edges with vintage photo distress ink and hand stitch them to the upper left corner of the page.


11) Lastly, stamp some butterflies (included in the kit) on vellum and cut it out. Fold the butterflies for some dimensions and add liquid pearls and Stickles to them. Paste them around the flower.
I bet everyone is busy preparing for Christmas and doing some last minute shopping now. It just feels so good during this time of the year. It's not celebrated that huge here in Malaysia and we don't have any snow at all....lol! I missed the cold weather!!
I'll be posting more projects using Queenscraps March kit on the next few days. Happy Christmas shopping!!


Sources: March Kit from Queenscraps: Card stock: Bazzill; Pattern Paper: Making Memories; Embellishments: 7 Gypsies Tags, Making Memories brads, Inkadinkado Stamps, Prima Say it in Crystals, Basic Grey buttons; Others not included in the kit: Ranger Distress Ink, Ranger Liquid Pearls, Ranger Stickles, Tsukineko Staz On, Heidi Grace stamp, Urban Lily Rub-ons, vellum, twines, zig pens, floss for stitching, Helmar glue, glue dots and other adhesives.

Huh !! !Marvelous ...love the rectangular piece from the "Die Cut Geometric" pattern.
ReplyDeleteIrene, as always beautiful. Your feeling for details is amazing! Nilla
ReplyDeleteso pretty and delicate. love all the little details. :) tereza
ReplyDeleteHi Irene,
ReplyDeleteYou have another masterpiece here. No matter what you do - you go into so much detail. It makes everything so very special as well as beautiful.
I wish I knew how you get such good control with the Liquid Pearls? Mine are always so wet they don't stay in nice little dots like yours do.
precious!
ReplyDeletei love butterflies :D
Hi Candy,
ReplyDeleteRegarding the liquid pearls, I think it's the matter of getting use to the consistency of it with the pressure you apply on the bottle while squeezing it out. After sometime, you'll find that you have better control of it.
WOW this is beautiful......
ReplyDeleteIrene, you always amaze me with your techniques, and everything that you do is just stunning!
I love the butterfly. Wonderful work detail as usual.
ReplyDeleteHappy Holidays
Heather
This is absolutely beautiful!!! You have mastered distress inks!!! Your attention to every detail is what makes every creation amazing!!!! Happy Holidays!!!
ReplyDeleteThis is soooooo beautiful!!!!!!
ReplyDeleteI really am, in love with that circular stamp you used. I've seen it a lot of thimes on your projects, and I love it.
Love the different stitches on the squares, and I love the bling and buttefflies..... Amazing work....again!