To create a background using this "inking in layers with masks" technique, simply follow the steps below:
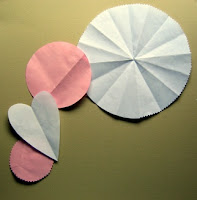
1. Placed your masks in any design you want on a cardstock. Stick it down using some temporary adhesives or just use a normal sticky tape and fold it in a circle.
2. Using triangle shaped cosmetic sponge, inked on all the edges of the masks. You can use whatever colours you wish.
3. Remove the masks and you will have your first layer. Don't worry about its' first look as it will gets better as you add more layers to it.
4. Place the masks for your second layer and inked on it again. (repeat step 2)
5. Remove the masks and you will have your second layer. The different tones and shades of areas are beginning to form. The places that you've inked most times, will have a darker shade and vice versa.
6. Placed your masks for the third layer and inked it again. (repeat step 2) My layout has only three layers of inking and masking, therefore I've to make sure that the masks placements are where I want the layout to look liked or at least it looks balanced.
7. Removed the masks and you will have your third layer. This is the final layer in my layout and I've tried to used a different colour ink to enhance the look of it.
You can do as many layers as you wish as long as you don't over soak the cardstock with too much ink on it. Try not to do designs which are too complex as it won't turn out well. Try it!


.JPG)
.JPG)
.JPG)
.JPG)
.JPG)
.JPG)
This is just awesome!! Love it all!
ReplyDeleteThanks for sharing this fabulous technique, you have inspired me to try it soon, thankyou xxx
ReplyDeleteThanks for sharing this fabulous technique, you have inspired me to try it soon, thankyou xxx
ReplyDeleteThis is a wonderful tip, I didn't know how to do it and now I'll try!!!
ReplyDeleteTFS!!
Lizzy
Thanks so much for sharing this tip, it helped a lot!!!!
ReplyDeleteLizzy