Sunday, November 30, 2008

Stitching on Flowers


This is a great technique to add textures and details to flowers with huge petals. I've recently use this technique in one of my project using Queenscraps Jan kit. If you noticed, there are a few Heidi Swapp large round paper flowers included in it. I've simply stitched some designs on all the petals and inked it for colours. I've also use the pinching to fold technique in the middle of each petal to give a little dimension to it. I just love how it turns out and will definitely use this technique again. Try it!

Friday, November 28, 2008

Queenscraps Jan kit

Isn't this kit just yummy! I'm so loving it! Since Queenscraps will be no longer be offering kits, the January, February and March kit (the last of it) is up at their site now. Remember to use the discount codes to enjoy some discounts when you're ordering. Here's the "discount codes" again.

The January kit consists mainly of some gorgeous Websters Pages pattern papers. There's so much stuffs in it and it even has a small bottle of shimmerz paint. So grab your kit while it's still available. Just click on the link on the right of my blog to go to the store.

I'll be working on this kit in the next few days and hopefully will start to post the projects next week. So, if you want to follow along my tutorials, get your kit now. Hope everyone is enjoying their thanksgiving dinner!

Thursday, November 27, 2008

Birthday Card


This is my third and final project as the guest designer for Purple Onion Designs. It's a four flaps open up card. It's all done using just a piece of pattern paper as the base.
Here are the steps:
1) Use a piece of pattern paper (preferably a 2 sided pattern paper) as the base. The middle of the card measures 6"x6". Just score the lines in all four sides with each flap measuring 3" x 6". Cut off all the extras on the corners of the pattern paper.
2) Ink all the edges using some distress ink and fold them up.
3) Use two pieces of the left over pattern paper and hand stitch some stitches around the edges and distress the edges using the scissors distressing technique. Ink it with distress ink and paste it in the first two flaps in front of the card.
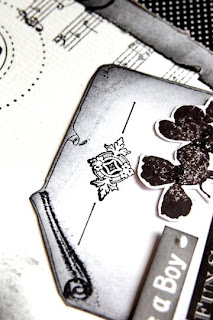
4) Stamp a small tag onto a white card stock and cut it out. Ink it with distress ink and write your theme on it. Mat it with a black card stock. Paste it in the lower right corner of the card.
5) Before creating the front center piece for the card, stamp some music notes using solvent ink on the middle flaps of the card.
6) Print a quote or poem from the computer and cut it out using a decorative scissors . Ink the edges using distress ink and mat it onto another card stock. Distress all edges using the scissors distressing technique. Stamp some images on it using solvent ink. Paste it on the right middle flap of the card.
7) I've also stamped a music note background in the middle of the card. Then, stamp a journaling box and cut it out. Ink it with distress ink and paste it in the middle of the card. Add a flower with some liquid pearls and Stickles to it.
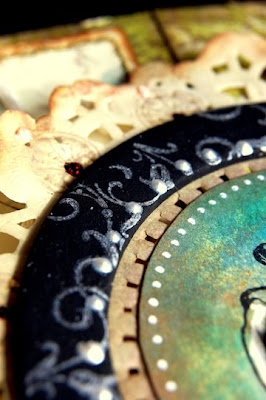
8) With the other layers all done, now we need to do the front center piece. Use a paper doiley as the base for this piece. Ink it with distress ink. Use a small stamp to stamp around it using solvent ink and add details to it using liquid pearls and Stickles.
9) Use a chipboard ring and paint it using black acrylic paint. Stamp some flourishes on it using a white pigment or solvent ink. Add liquid pearls on the inner edges of the ring. Paste it on top of the paper doiley.
10) Cut out a smaller circle from a card stock and stamp an image on it using solvent ink. Use the "Crayon Resist" technique to ink it. Then stamp another image using solvent ink on a white card stock and cut it out. Paste it using a foam adhesive or pop dots on top of the stamped image of the circle piece. Dress it up with some Stickles and white doodling pen. Paste the circle in the middle of the paper doiley.
11) Attach only the upper half of the center piece to the upper flap in front of the card. While attaching, add a string under it and have it going around the back until it comes up from the bottom of the card on the lower front flap of the card. Tie the string to secure the flaps in place.
This is such a fun card to create. Hope you all like it and have a cozy Thanksgiving! Hugs!
Sources: Card Stock: Bazzill; Pattern Papers: K and Company; Inks: Ranger Distress Ink, Tsukineko Staz On; Stamps:Purple Onions Designs; Others: Ranger Liquid Pearls, Making Memories Acrylic Paint, Prima flower, Zig Writers, Uni-ball signo white gel pen, Ranger Stickles, paper doiley, string, Helmar Glue and Glue Dots.

Wednesday, November 26, 2008

Happy Thanksgiving!

Even though we do not celebrate Thanksgiving here in Malaysia, I would still like to take this opportunity to thank all my blog readers and followers. You all had been a great support and encouragement to me all this time. Thank you very much! I would also like to wish those of you who are celebrating Thanksgiving a very loving and warm Thanksgiving!!

Tuesday, November 25, 2008

Angel Treasure (Altered Frame)


This is another of my guest designing project for Purple Onion Designs. It's an altered frame using loads of inks and stamps. I've used Creative Imagination chipboard frame to alter.
Here are the steps.
1) First, cover the front of the frame with a piece of pattern paper and use some Mod Podge to seal it.
2) I've used Heidi Swapp flourishes mask to mask some flourishes on the left and bottom of the frame using distress ink.
3) I've used a music note stamp and timber brown solvent ink to stamp on top of the frame and on the lower right of it.
4) Use another flourishes corner stamp to stamp on the upper right of the frame.
5) Stencil a bigger rectangle frame just outside the frame for the photograph using black soot distress ink. Using another small stamp and some Jet Black solvent ink to stamp around the frame. Add details using a white gel pen and some Stickles.
6) I've hand drawn some flourishes on the left of the frame using a black pen and later add some sepia accents and Stickles to it for details.
7) I've stamped and heat embossed a sign using some gold embossing powders on a black card stock and cut it out. Paste it on the top left corner of the frame.
8) Add a Bazzill Just The Edge card stock on the bottom of the frame and detail it using some liquid gel and a black and white pen. Add a strip of sheer lace on top of it.
9) To create the flower, first you need to cut out a huge flower from an alcohol inked vellum using the "Alcohol Inked Vellum Flowers" technique. Add a layer of large white daisy on top of it. To further decorate it. I've stamped and heat embossed a watch on black card stock and cut it out to layer on top of the flower. Add some ribbons to it and a brad to attached everything together.
10) Add some flowers to the upper right of the frame to balance the look and to add a splash of colour to it.
Hope you all like this little altered frame.


Sources: Creative Imagination chipboard frame; Card Stock: Bazzill; Pattern Papers: Imagination Project; Inks: Ranger Distress Ink, Tsukineko Staz On, Ranger Emboss It; Stamps:Purple Onions Designs; Others: Heidi Swapp mask, Ranger Liquid Pearls, Ranger Sepia Accents, embossing powder, sheer lace, Prima flower, ribbons, Zig Writers, Uni-ball signo white gel pen, Ranger Stickles, Helmar Glue and Glue Dots.

Monday, November 24, 2008

Just Us


This is a black and white layout that I've created as one of my guest designing project for Purple Onion Designs. All the stamps used in this layout are all from them. This layout is about my two little cupcakes that always adds so much sprinkles and sweetness to my everyday life..lol!

Here are the steps to it.
1) First, I've scalloped the two edges of the white card stock which I've used as the base for this layout. Ink the edges using black soot distress ink.
2) Stamp a music note background stamp on the white card stock suing a black solvent ink. Layer on top of it using two pieces of pattern papers.
3) I've used the Purple Onion Designs scroll stamp to stamp on another white card stock and cut it out. Ink the edges using black soot distress ink and paste it on the left of the page.
4) Distress the photograph using the "Distressing your Photographs Using Hole Puncher" technique and ink it with black soot distress ink. Then, paste the photograph on top of all the pattern papers on the right of the layout.
5) I've used another plant stamp from Purple Onion Designs to stamp on a white card stock and paste it on top of the scroll on the right.
6) Use a sheer ribbon to create a strip of ruffles at the bottom of the photograph. Hand stitch the ribbon to secure it in place. Add a strip of lace flowers on top of it.
7) The huge flower on the left had been created using the "Spiral Flower" technique and I've added a chipboard circle in the middle of it.
8) I've also painted a small chipboard frame in black and add some glossy accents to it. Use it to embellish the top left corner of the photograph.
9) To dress up the upper right corner of the page, I've used one of Purple Onion Designs flourish stamp to stamp on black card stock using embossing ink and heat embossed it using some white embossing powders. Cut it out. Add two strips of silver beads on both ends of it and finish it off with another two stamping in black solvent ink.
10) The title is actually a rub-on and I've added a small stamped box on the lower left of the page.
I've created this layout by using nine of Purple Onion Designs stamps. Hope you all like it.
Thanks to all of you who had added me to your friends list in facebook! I'm so looking forward to get to know you all more.

Sources: Card Stock: Bazzill; Pattern Papers: DCWV; Inks: Ranger Distress Ink, Tsukineko Staz On, Ranger Emboss It; Stamps:Purple Onions Designs; Rub-Ons: Urban Lily; Others: Ranger Liquid Pearls, Ranger Glossy Accents, Making Memories Acrylic Paints, embossing powder, Zig writers, lace flowers, sheer ribbon, chipoards, crystals, Helmar Glue and Glue Dots.

LinkWithin

Blog Widget by LinkWithin